
TL;DR:
- Position sizing is the process of determining how many shares or contracts to trade based on risk tolerance and stop-loss distance, forming the foundation of effective risk management. Properly calculating size using the core formula ensures traders control drawdowns, maintain emotional stability, and optimize long-term growth. Always identify your stop level first before sizing to avoid unplanned risks, and adjust position size based on asset volatility using ATR for consistent risk across assets.
Position sizing is defined as the process of calculating exactly how many shares, lots, or contracts to trade by linking your stop-loss distance and risk tolerance to a specific dollar amount you are willing to lose. Every professional trader treats it as the foundation of risk management, not an afterthought. Get it wrong and even a winning strategy bleeds your account dry. Get it right and you can survive losing streaks, stay emotionally steady, and let compounding do its work over time.
Most retail traders focus obsessively on entry signals and ignore the one variable that determines whether they survive long enough to profit. Proper position sizing turns an edge into compounding growth rather than catastrophic drawdowns. The standard industry term for the broader discipline is “position sizing strategy,” and it applies across stocks, forex, futures, CFDs, and options equally.
What is position sizing and how does the formula work?
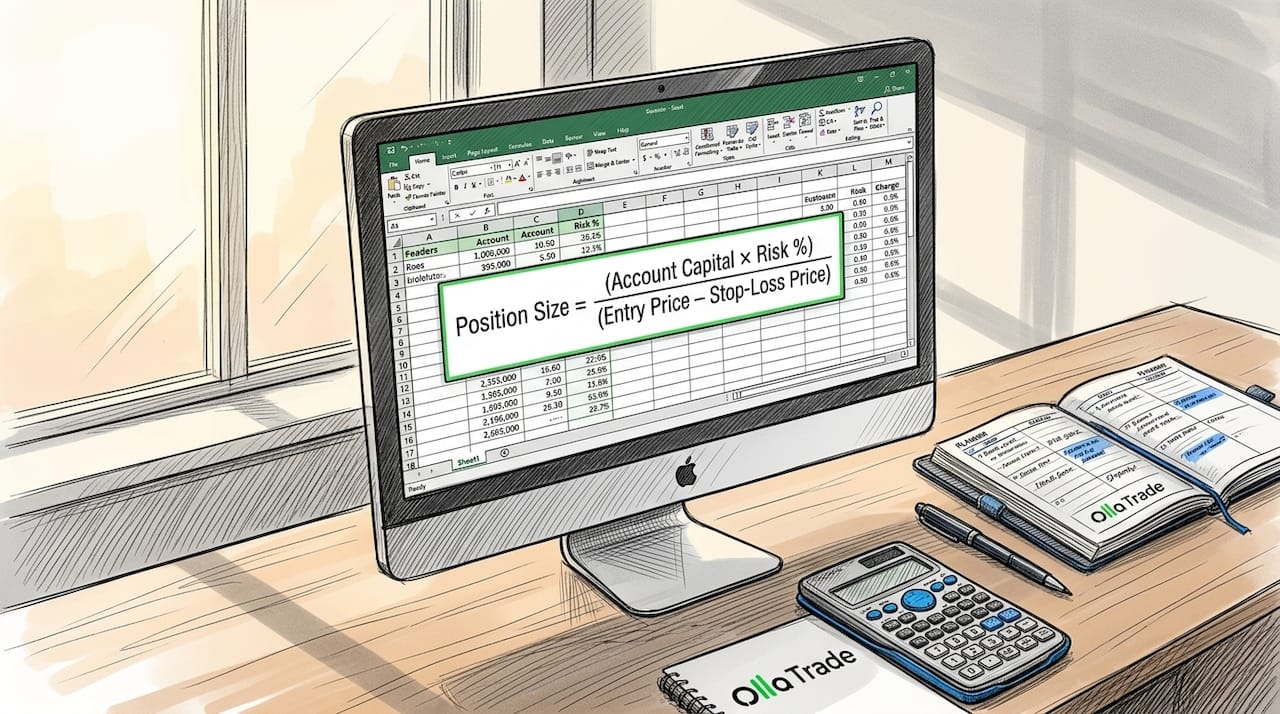
Position sizing is calculated using one core formula: Position Size = (Account Capital × Risk %) ÷ (Entry Price − Stop-Loss Price). This formula ties three variables together. Your account capital sets the total pool. Your risk percentage defines how much of that pool you are willing to lose on a single trade. The distance between your entry and stop-loss converts that dollar risk into a specific number of shares or contracts.
Here is a concrete example. You have a $10,000 account and decide to risk 1% per trade, which equals $100. You plan to buy a stock at $50 with a stop-loss at $45, giving you a $5 stop distance. The formula produces: $100 ÷ $5 = 20 shares. You buy exactly 20 shares. If the trade hits your stop, you lose $100. Nothing more.
The sequence matters as much as the math. Identify your stop level first, then calculate size. Reversing this order, picking a share count first and then placing a stop wherever it fits, creates a risk mismatch that produces unplanned losses. Most novice traders make exactly this mistake.
Pro Tip: Never decide how many shares “feel right” and then place a stop. Always determine where the trade is invalidated on the chart first, then let the formula tell you how many shares to buy.
The table below shows how position size changes as stop distance varies, assuming a $10,000 account with 1% risk ($100 at risk):
| Stop distance | Dollar risk | Position size (shares) |
|---|---|---|
| $1.00 | $100 | 100 shares |
| $2.50 | $100 | 40 shares |
| $5.00 | $100 | 20 shares |
| $10.00 | $100 | 10 shares |
A wider stop forces a smaller position. This is not a penalty. It is the formula protecting you from volatility that would otherwise shake you out of a valid trade.
How volatility changes your position sizing strategy
Static stop distances ignore the reality that different assets move differently. A $2 stop on a $20 stock is enormous. The same $2 stop on a $200 stock is almost invisible. The Average True Range (ATR) solves this by measuring how much an asset actually moves on an average day, giving you a volatility-adjusted baseline for stop placement and sizing.
The ATR-based sizing formula is: Size = Risk $ ÷ (N × ATR), where N is the number of ATR multiples you use as your stop distance. Typical N values range from 1.5 to 2.5 ATRs. If a stock has a 14-day ATR of $3 and you use N = 2, your stop distance is $6. With $100 at risk, your position size is 100 ÷ 6 = approximately 16 shares.
This approach keeps your dollar risk consistent regardless of which market you trade. Whether you are sizing in shares for equities, pips for forex, or ticks for futures, the underlying math is identical. The units change but the logic does not.
Key considerations when applying volatility-adjusted sizing:
- Shares (stocks): Size directly from the formula above; fractional shares are available on some platforms.
- Lots (forex): One standard lot equals 100,000 units; micro and mini lots allow precise sizing for smaller accounts.
- Contracts (futures): Each contract has a fixed tick value, so you convert dollar risk to contract count using the tick value.
- Options: Position sizing is more complex because premium decay and delta affect realized risk.
Scaling into a position adds another layer of complexity. When you add to a trade at a second entry point, you are not just sizing one position. You are stacking risk. Managing scale-in trades requires planning the entire entry ladder so that the total aggregate risk across all entries stays within your original per-trade risk limit. Ignoring this is one of the most common causes of account blow-ups among retail traders.
Pro Tip: When scaling in, treat the combined position as one trade. Add up the dollar risk from every entry and make sure the total does not exceed your single-trade risk limit before placing the second order.
Why position sizing matters for risk control and psychology
The importance of position sizing extends well beyond math. It directly controls the size of your drawdowns and, more critically, your ability to keep trading through a losing streak. A trader risking 10% per trade needs a 50% gain just to recover from five consecutive losses. A trader risking 1% per trade needs only a 5.1% gain to recover from the same five losses. The math is not subtle.
“Risk-based sizing transforms position sizing from guesswork into a deliberate process, pre-committing the maximum dollar loss before the trade is placed.” — StockCharts Insider
The psychological benefit is equally real. When you know your maximum loss before you enter, fear loses its grip. You stop watching every tick with anxiety because you already accepted the worst case. Position sizing controls emotional pressure by pre-committing that maximum dollar loss, which reduces impulsive decisions to move stops or exit early out of panic.
Oversizing does the opposite. When a position is too large, price action that should look like normal noise starts to feel like a catastrophe. You move your stop to avoid a loss, or you exit a perfectly valid trade because the dollar figure on screen is too uncomfortable. The 1% to 2% risk rule exists precisely because it keeps individual losses small enough to be emotionally manageable. For a $10,000 account, that means risking between $100 and $200 per trade. These are numbers most traders can absorb without panic.
Portfolio-level position sizing adds another dimension. Allocating capital relative to other open positions based on expected risk and return affects total drawdown and survivability beyond any single trade. Holding five positions each risking 2% means 10% of your account is at risk simultaneously. That is a number worth tracking.
How leverage and margin affect position sizing in practice
Leverage changes the practical execution of position sizing without changing the underlying formula. In forex and futures, you do not need to post the full notional value of a position. You post a fraction called margin. Required margin equals position size divided by leverage, and this relationship directly constrains how large a position you can actually open.
Consider a forex example. You want to buy 10,000 units of EUR/USD (one mini lot). With 50:1 leverage, the required margin is 10,000 ÷ 50 = $200. Your broker must have at least $200 free in your account to open that trade. If your account is small, broker margin rules can force you to size down even when your risk formula says a larger position is acceptable.
The table below illustrates how leverage affects required margin for a 10,000-unit forex position:
| Leverage | Position size (units) | Required margin |
|---|---|---|
| 10:1 | 10,000 | $1,000 |
| 25:1 | 10,000 | $400 |
| 50:1 | 10,000 | $200 |
| 100:1 | 10,000 | $100 |
Higher leverage reduces margin requirements but does not reduce your actual dollar risk. Your stop-loss distance still determines how much you lose if the trade goes against you. Understanding leverage fundamentals is non-negotiable before trading any leveraged instrument.
One practical complication: futures and forex contracts come in fixed sizes. You cannot buy 1.7 contracts. You must round to the nearest whole contract, which means your actual dollar risk will differ slightly from your target. Always check the rounded figure against your risk limit before placing the order. The Kelly Criterion offers a more advanced framework for sizing by converting your statistical edge into an optimal capital fraction, but it is sensitive to estimation errors. Fractional Kelly, typically 25% to 50% of the full Kelly output, is the practical standard among systematic traders.
Key takeaways
Effective position sizing requires calculating trade size from stop-loss distance and risk percentage, not from intuition or arbitrary share counts.
| Point | Details |
|---|---|
| Core formula | Divide your dollar risk by stop distance to get exact shares or contracts. |
| Stop first, size second | Always place your stop-loss level on the chart before calculating position size. |
| Volatility adjustment | Use ATR-based sizing to keep dollar risk consistent across different assets. |
| Risk per trade | Risking 1% to 2% per trade limits drawdowns and preserves emotional stability. |
| Leverage awareness | Required margin equals position size divided by leverage; broker rules can cap your size. |
The workflow most traders skip
Most traders I have observed spend hours analyzing charts and minutes on sizing. That ratio should be reversed. The entry signal tells you where to get in. Position sizing tells you whether you survive to trade again next week.
The single most valuable habit I have seen separate consistent traders from account-blowers is the “stop first, size second” workflow. It sounds obvious. Almost nobody follows it instinctively. New traders pick a round number of shares because it feels clean, then place a stop wherever the chart allows. The formula gets ignored entirely. The result is that a single bad trade wipes out ten good ones.
I have also watched traders scale into positions without tracking aggregate risk. They add a second entry, then a third, each one “small.” By the third entry, they are carrying three times their intended risk on one directional bet. When the trade reverses, the loss is not a planned 1%. It is 3% or more, and it feels like a disaster because it was never accounted for.
Proper sizing does not make you a better analyst. It makes your analysis survivable. A mediocre strategy with disciplined sizing will outperform a brilliant strategy with reckless sizing over any meaningful time horizon. That is not an opinion. It is arithmetic.
— FX
Start trading with the right tools at Ollatrade
Ollatrade gives retail traders direct access to forex, CFDs on metals, indices, stocks, and cryptocurrencies through a platform built for both beginners and experienced traders. The MetaTrader 4 integration includes tools for setting precise stop-loss levels, visualizing margin requirements, and calculating position sizes before you commit capital. If you are ready to apply the sizing principles covered here, the Ollatrade forex platform is built to support that workflow from your first trade. For a structured walkthrough of risk management in live markets, the forex trading step-by-step guide covers position sizing, stop placement, and leverage management in a single practical resource.
FAQ
What is the basic position sizing formula?
Position size equals account capital multiplied by risk percentage, divided by the distance between entry price and stop-loss price. For a $10,000 account risking 1% with a $5 stop distance, the result is 20 shares.
How much should I risk per trade?
Retail traders typically risk 1% to 2% of their account on a single trade. On a $10,000 account, that means a maximum loss of $100 to $200 per trade, which keeps drawdowns manageable across losing streaks.
What is ATR-based position sizing?
ATR-based sizing uses the Average True Range to set a volatility-adjusted stop distance. The formula is: Size = Risk $ ÷ (N × ATR), where N typically ranges from 1.5 to 2.5 ATR multiples.
Does leverage change my position size calculation?
Leverage changes the margin you need to post but does not change your actual dollar risk. Your stop-loss distance still determines your loss. Required margin equals position size divided by leverage, and broker rules can limit how large a position you can open.
Why does stop placement come before position sizing?
Identifying the stop level first defines the risk per unit, which is the denominator in the position sizing formula. Sizing first and then placing a stop wherever it fits creates unplanned risk and is one of the most common trading mistakes retail traders make.